Assign Zones
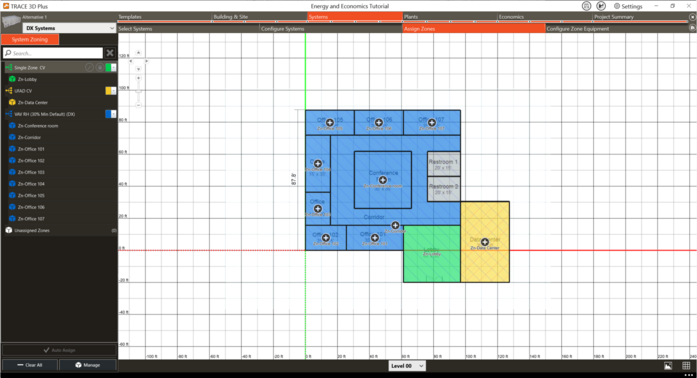
In order to size the components of the system (coils, fans, etc.), the program needs to know what rooms are served by each system. Rooms were already zoned together in the building section of the program. Now those zones are assigned to systems. The Assign Zones screen is comprised of two windows. The tree structure and zone assignments pane, and the system diagram. Zones can be assigned to systems by opening the zone manager, highlighting a system in the tree, and clicking the plus sign next to rooms in the assignment manager that should be assigned to that system. Additionally, zones can be assigned by highlighting a system in the tree and clicking the plus button on the rooms in the system diagram.

Tree Structure
The tree structure in the zone assignments tab lists all of the systems that have been created in the project. By default, no zones are assigned to any system. The Zone Manager button brings up a list of the zones that have not been assigned. As zones are assigned to systems, they will appear under their system in the tree.
Zone Manager
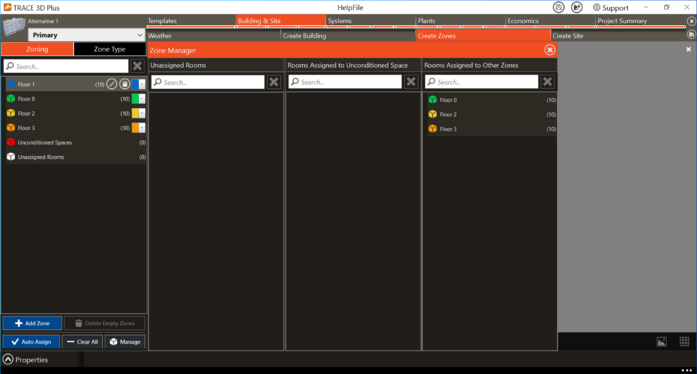
The zone manager button opens the zone assignments pane. Here, unassigned zones can be assigned to the highlighted system by clicking the plus button next to the zone.
Zones that are already assigned to another zone can be reassigned to the highlighted system by clicking the plus button next to the zone.

Clear All Zoning button
The clear all zoning button removes all zones from all systems.
Auto Assign button
The auto assign button will be available only when there is one system in the project. When there is only one system in the project, all zones will need to be assigned to that system. Instead of assigning each zone one at a time, the Auto Assign button can be used to automatically assign all zones to the system with just one click.