Floor Plan Image Import Tools
Tools used to import and manipulate plan image to the active level.

Import Image
Click Floor Plan Image Import Tools icon to open the toolbar.
Load Image
Click this icon to access the file selection dialogue. Available image types include .png, .jpg, .jpeg and .pdf can be selected by changing the file type.

Navigate to the desired plan image and click “Open” to add plan image to the project. Image is displayed on the active level and added to the tree in the active level.
For .pdf files, the image can be scaled at input time based on paper size and scale. Importing another plan image on any given level replaces the previously imported image.
Scale Floor Plan (.pdf only)
This dialogue enables scaling of .pdf plan images to be scaled based on actual scale in the file. This function should be used only with .pdfs that have been generated from a CAD tool, not for scanned .pdf images.
Original Width and Original Height are determined from the page size of the imported document.
Scaled Width and Scaled Height represent the dimensions of the image after scaling. The plan image document will be rendered in the drawing canvas matching these values.
Scale inputs are used to scale the image – be sure to read the scale on the image prior to importing. Alternatively, open the file in File Explorer to verify the scale prior to entering.
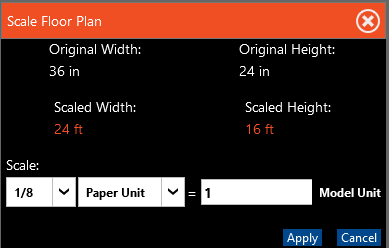
Scale: Default values are 1 Paper Unit = 1 Model Unit
Paper Scale: Use the list box to select the paper scale and units of scale.
Model Units: Feet or Meters, depending on Settings > Regional > Units for IP or SI, respectively.
Example: If the plan image has a scale of 1/8” = 1 foot, select 1/8 Paper Scale = 1 Model Unit in IP.
The page will be scaled and require only to be moved to the desired spatial location.
Move Origin
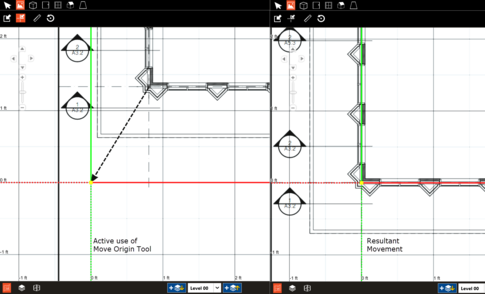
Use this tool to move the plan image to the desired location.

With the tool enabled, click on the desired reference point in the plan image. Drag the cursor to the point in the drawing canvas to be aligned with the selected point in the plan image.
-
To move a specific point to the origin, drag to origin and snap to it. Click to complete the movement.
-
When drawing a rectangular building, moving the center of the southwest corner of the building to the origin is recommended.
-
Zoom in to gain precision on the point to be moved in the plan image.
In cases where plan images are sectioned, this tool can be used to align a new image with existing geometry.
Scale Image
The image scale tool is used to set the scale of an imported floor plan image. This tools is required for images non-native .pdfs.

This tool is active by default when file types other than .pdf are imported.
To scale an image, zoom into a point that has another reference of known distance.
-
Enable the Scale Image Tool in the Floor Plan Image Import Tools.
-
Click on the first point and drag to the second, click on the second reference point.
-
Enter the actual distance between the two points in the dialogue box, units are based on Setting > Regional > Units.
The plan image is scaled based on the input.
Example:
Active tool and zoom in to first reference point. The cursor indicates the tool is active.
In this example, the net length is 46 feet.
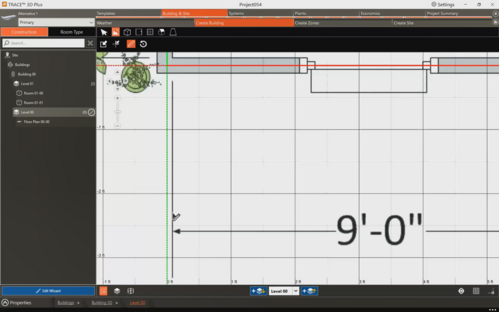
Pan using right-click with the mouse to move to the secondary reference point.
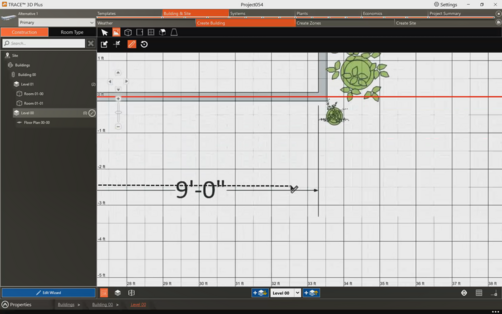
Hold the SHIFT key to snap the scaling tool parallel with the axis.
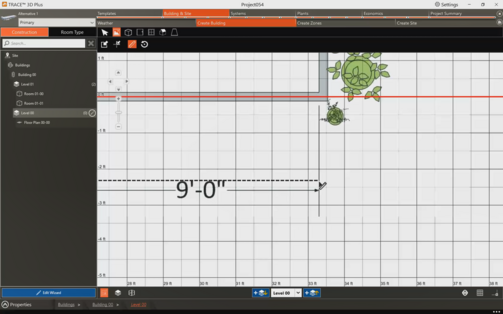
Click on the secondary reference point to enable the scale plan image input dialogue.
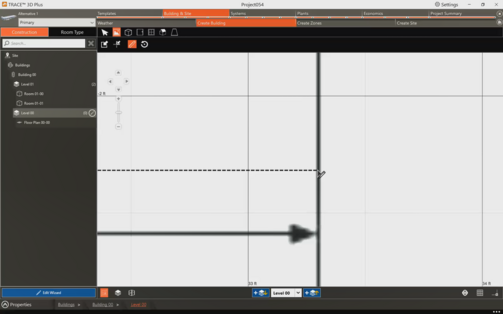
Enter the actual distance between the points and click Apply.

The resultant distance is applied to the image.

Input Considerations:
Scale along the longest known length in the plan image to achieve the best precision.
Use SHIFT to align the scaling tool to the axes, when within 15 degrees.
The tool can be used to measure the distance existing geometry on an already created level. The value can then be entered as the scale for another plan image that has the same scale.
Rotate Image
The rotate image tool will rotate the imported floor plan image around a selected point.

This step is required most often for scanned images that are not aligned with an axes or for images that are rotated from Building North.
-
Select the point around which the image shall be rotated.
-
Zoom out to gain precision by selecting a line that traverses the extent of the plan image.
-
Click to set the second point, representing the axis that will be rotated.
-
Move the cursor to the point that represents the desired rotation.
-
Click to apply the desired Plan Image Rotation.
Input Considerations:
Set the rotation link along the longest known length in the plan image to achieve the best precision.
Use SHIFT to align the scaling tool to the axes, when within 15 degrees.
The tool can be used to align a plan image with known geometry. Snaps can be used to align the rotation tool with edges or vertices of existing geometry.
Floor Plan Image Properties
Use to apply scaling, rotation or origin to one plan image from another.

“Current” Row indicates the properties applied to the selected Plan Image and is Read-Only.
“Proposed” allows for modification to each property.
“Copy Properties From” list box allows for all properties of an existing Plan Image to be applied.
Review the Proposed Row and click Apply to apply change to the selected Plan Image.
Modify input fields from this section as desired.
Each property field is propagated from the tool inputs if manual manipulation has been performed.
Scale
Scale applied to image from default imported scale.
Default: 1
Typical: 1-500
Image Orientation
Rotation applied to image in the clockwise direction.
Default: 0 degrees
Min Max: 0-360 degrees
Image Origin X
X coordinate of the center of the image in drawing canvas.
Default: Depends on scale,size of imported image.
Min Max: N/A
Image Origin Y
Y coordinate of the center of the image in drawing canvas.
Default: Depends on scale,size of imported image.
Min Max: N/A
Copy Properties From:
This list includes all plan images imported into the project file.
Default: “Copy Properties From”
Select an image in the project to assume the same properties.
Click Apply to apply any and all changes from the Proposed Row into the Current Row.