Plant Configurations
Plant configurations are combinations of loops from the Loops Library. These loops have the supply-demand connections of components that need to be pre-assigned (for example a chiller assigned to a cooling tower). This allows you to save time in the Create Plants section of the project, by using the Plant Wizard button to bring in all of the loops.
To create a new plant configurations library member, click on the + Add Item button. You can also create custom groupings for organizing the library by clicking on the Add Group button. A plant configurations library member can be added to custom groups by dragging and dropping. Right clicking on an existing library member allows you to rename, copy, delete, lock and unlock a plant configurations library member.
The Library Member contains a tree on the left-hand side of the screen with the Plant Configuration, a Loop Selection Bar, and a Plant Diagram.
Plant Configurations Library Member
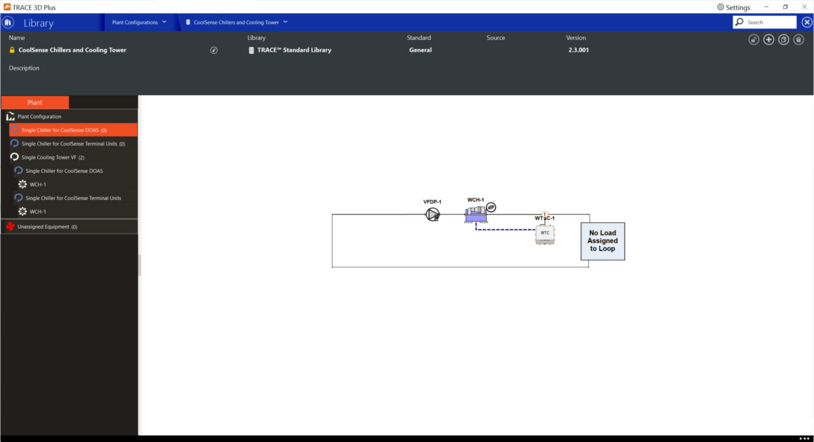
The General Library Member Information is displayed at the top of the screen. To build a plant configuration, select a loop type from the Loops Library selection bar. This will display the existing loop library members categorized by their Library Groups. Any loops that are not placed under a group will be displayed in the “Un-Assigned Folder” group. The plant diagram will display the schematic of the selected loop. Use the pull down menu under each library group to view the loop schematics before adding them to the plant configuration. To add a loop, click the Use plant configuration button at the bottom of the plant diagram. Continue to add loops as necessary. Loops that have been added will be displayed on the Plant Configurations Tree on the left side of the screen.
Once all loops have been added, they must be assigned to each other. To do this, expand the Loop Manager by clicking its button located at the bottom of the Plant Configurations Tree. The Loop Manager will display the added loops along with the components that need to be assigned as demand objects to other loops. When a loop is selected on the Plant Configurations Tree, the list of components shown in the Loop Manager changes to display only those that can be added as demand object to the selected loop. To assign/add a component to the selected loop, click on the + to the left of the component name on the top menu. To assign/add all of the components of a loop at a time, click the + to the left of the loop name. As components are assigned, they will be shown in the Loop Manager as “Equipment assigned to other loops”. Continue until all components are assigned. The Plant Configurations Library Member is complete when all components are assigned.
To unassign components, click the – next to each component that you would like to remove. You may also click on the “Clear All” button at the bottom of the Plant Configurations Tree to remove all assignments.
Plant diagram
The plant diagram is a graphic representation of a loop. It displays the supply side components and controls that make up the loop as well as a demand box.
Plant Configurations Tree
The plant configurations tree displays the names of the loops that have been added to the plant configuration. The tree after assignment will contain the building name, supply loop name, demand loop name that is assigned, and any demand components that are assigned to the supply loop name. This tree will not have any link icons. This tree will not show any supply components. Loop names can be listed twice within the same tree (as long as there are different demand components). No renaming of objects (loops, components, and controls) can be done here in the tree.
Clicking on a loop name displays its Plant diagram. Double clicking the name of a loop on the tree will contract or expand it to display if any components have been assigned to it.
Loop components are assigned to each other using the Loop Manager. The Loop Manager button is at the bottom of the Plant Configurations tree and it has two parts:
1. List of unassigned equipment
2. Equipment assigned to other loops
If you highlight a loop for assignment and there is a demand object that cannot be assigned, it will be greyed out in the loop manager tree. As objects become assigned, they will always be displayed in the “equipment assigned to other loops” section.