Settings
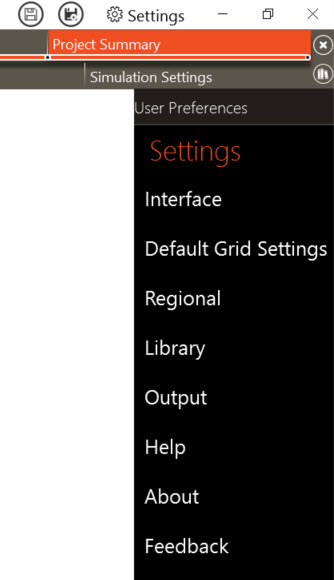
The Settings or User Preferences area can be accessed using the gear icon on the top right bar of the application. It allows you to modify various settings from any screen or section. The settings that can be configured in this menu relate to overall functionality or appearance of the program itself not to be confused with Simulation Settings which are more granular in regards to project-specific settings.
Interface
In the Interface Section, you can make changes to the overall appearance of the program as well as changing the operating mode and turning on or off some of the guides providing tips as you work with the software.
Operating Mode
TRACE® 3D Plus has two distinct operating modes, Load Design which is essentially sizing equipment using ideal loads and TRACE 3D Plus which includes the design sizing but also performs part-load calculations throughout the year to simulate building energy consumption. This mode also performs life cycle cost analysis by incorporating an economics such as installation, maintenance and utility costs.
It should be noted that this is different than Simulation Method which can be changed on the Calculation Status tab of the Calculate Results section and in the Project Defaults.
Show Tool Tips
The Show Tool Tips checkbox allows you to enable and disable the tips pop-up windows on the drawing canvases in the Building and Site sections.
Perform Library Reconciliation
The Perform Library Reconciliation feature performs a comparison between the project library and the library located on the computer the project is being opened on. If the program detects a difference between the library members, you will be given the option to replace the project library member with the library member on the computer. The comparison is based upon a GUID (Globally Unique Identifier) as well as the date of the global library (library located on the computer). If the library member in the global library is newer, the item is presented to you for reconciliation. You are then presented with a list of library members that qualify for reconciliation and can choose if you would like to perform this reconciliation and which library members to reconcile.
This library reconciliation only occurs upon opening of a project. If you open a project with this option unchecked, but would like to perform the reconciliation, the project will need to be closed and you will need to open Preferences and check this box. Once this has been done, reopening the project will initiate reconciliation. Reconciliation does not affect the global library. Files can only have library members from the global library replace the project library members. Additionally, library members on a file cannot replace global library members.
Sort Lists
There are two methods in which TRACE 3D Plus will sort the spaces and systems in lists: Alphanumerically and As Entered. When Alphanumerically is selected, the room lists sort the rooms and systems with those having numbers at the beginning of their names first and proceed chronologically followed by the rooms or systems with names starting with letters. As Entered will simply list the elements in the order in which they were created.
Sort Lists sorts the tree lists in the Create Building, Create Zones, Create Systems, Create Plants, and Meters sections.
Colors
You are able to customize the appearance regarding the colors used for text in fields when referencing template values and the color of the model drawing background.
The Text Color – Inheriting Template Value field dictates the color of the text for fields referencing templated data. You are able to set this to any color desired.
Model Options
This section allows you to toggle on and off whether numerous descriptive elements and guides are displayed in the CAD drawing environment of the Building, Site and System sections. These options include:
Grid
Axes
Rulers
This option toggles on or off the display of the guide rulers shown along the axes of the Building and Site drawing canvases.
Room Name
This option toggles on or off whether the descriptive room name is displayed for each room on the drawing canvas area of the Building section.
Room Floor Area
This option toggles on or off whether the floor area is displayed for each room on the drawing canvas area of the Building section.
Room Inside Dimensions
This option toggles on or off whether the interior dimensions of walls, partitions, windows, doors, etc. are displayed on the drawing canvas of the Building section.
Room Outside Dimensions
This option toggles on or off whether the exterior dimensions of walls, partitions, windows, doors, etc. are displayed on the drawing canvas of the Building and Site sections.
Regional
This section allows you to customize the input and output to match the local unit systems. You are able to use the Imperial or Inch-Pound (IP) system or the International System (SI). You can also change the language in which the program and output reports are displayed and enter the desired currency symbol.
The currency symbol field simply changes the character displayed and does no currency conversion. This is a free-text field which is limited to three characters.
Library
The Library section allows you to filter what is displayed in the library as well as how the weather locations are displayed.
Delete Confirmation
This option allows you to toggle on and off the warning message displayed when deleting a custom library member.
Weather Default View
This section allows you to choose how they would like to display the weather locations in the library. The Tile view shows a block representing the Sub-region with the number of weather locations in that Sub-region. The Map view is a world map with each weather location represented by a dot on the map.
Library Filters
There are a number of different ways to filter the library to only display the library members desired. Applying these filters does not render any library members inaccessible; they are simply filtered out to simplify the listing when perusing the library. The filters are as follows:
● IP-Based
● SI-based
● Standard
● Custom
Output
This section allows you to set defaults for the program related to the files and the output reports. These options include the Default Projects Directory where project files will be saved to unless otherwise specified and Default Zoom which dictates the zoom in the Report Preview area. Regarding printing of reports, you can set the Default Printer as well as the desired Paper Size.
Help
This section gives you ready access to help documentation as well as contact information for the C.D.S. Support Team. There are links to access the entire F1 Help documentation contents as well as links to the Getting Started eLearning videos (Load 101 and Energy 101). There is also a link to the Help section of the C.D.S. website allowing you access to additional help documentation, eLearning videos and the ability to create and manage support tickets.
About
This section allows you the ability to view version information as well as set the user name, company name and firm ID. The annual license renewal date is also shown. You will also be able to initiate the activation of the program, begin the annual license renewal process and return the license to deactivate the software.
Feedback
This section displays the data that we may collect and allows you to unsubscribe.